Skip to content

Blog

Development on the Raspberry Pi

RaspberryPi Logo

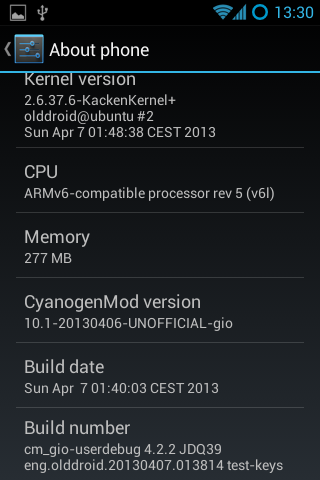
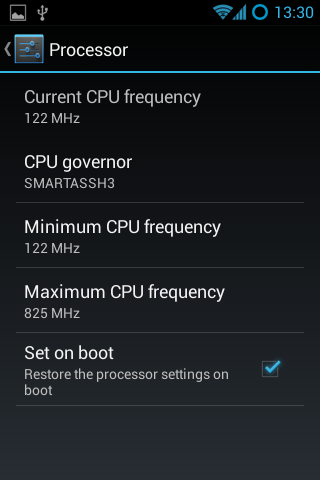
Now that I'm a proud owner of a Raspberry Pi, I've being really stressing the little guy. There is only but so much a ARMv6 processor, on an microSD with only 512MiB of ram can do, which means that compiling on such a machine is going to take a really long time.

Take for example OpenMW, currently it takes about 4 minutes on a quad-core i7 to compile. You're in for a treat on the Pi, it will take you at least a day, two days if you realize that half-way through the OOM Killer came through and killed your cc process. This is about the time you start wondering about various ways to improve the situation, such as a larger swap file or using zram.

At this point, I was wondering about other ways compiling binaries and packages for the Pi. There was cross-compiling, but then I would have to set up a full toolchain and recompile all the packages from scratch. That will have to be for another post though as it is another world. Another option is to try virtualizing the Pi and apparently QEMU gets us pretty darn close.

Let us begin with the preparation of our environment. We'll get the latest Raspbian release and clean up it for use in a QEMU environment.

# get the latest Raspbian: wget http://downloads.raspberrypi.org/raspbian_latest

create new target image of about 20GiB and mount it

dd bs=1 count=0 seek=20G if=/dev/zero of=raspbian.img sudo losetup -f --show raspbian.img

mount downloaded raspbian image and copy over

sudo losetup -f --show 2014-06-20-wheezy-raspbian.img sudo dd if=/dev/loop1 of=/dev/loop0 sudo losetup -d /dev/loop1

resize partition, edit one file, and umount

sudo parted /dev/loop0 resizepart 2 20GB

resize our filesystem

sudo partprobe /dev/loop0 sudo resize2fs /dev/loop0p2

editing out shared lib preloading so that it fully boots

sudo mount /dev/loop0p2 /mnt/image sudo sed -i s/'\/usr'/'#\/usr'/g /mnt/image/etc/ld.so.preload cp /mnt/image/boot/kernel.img ~/kernel.img # used later in the custom built qemu sync sudo losetup -d /dev/loop0

At this point, you have an image for QEMU to use but now you have to choose. There are two routes:

  • The default QEMU with only 256MiB of ram and a slightly different kernel than the Raspbian one because it uses a different CPU. The benefit here is that you don't have to do much, just apt-get install and you're on your way.
  • The modified QEMU, that gives you native RPi support so you can use your Raspbian kernel. It also has 512MiB of ram, like the RPi B+ which helps with compiling. The only drawback currently is the lack of networking.

First choice: # get a kernel: wget http://xecdesign.com/downloads/linux-qemu/kernel-qemu

fire up QEMU:

qemu-system-arm -kernel kernel-qemu -cpu arm1176 -m 256 -M versatilepb -no-reboot -serial stdio -append "root=/dev/sda2 panic=1 rootfstype=ext4 rw" -hda raspbian.img

Second choice: # setup build environment, configure and compile sudo aptitude install libsdl-dev libfdt-dev git build-essential git clone git://github.com/Torlus/qemu.git -b rpi cd qemu ./configure --target-list="arm-softmmu arm-linux-user" --enable-sdl make -j8

remember that kernel.img we copied earlier? We can use it here!

run our newly made system

arm-softmmu/qemu-system-arm -M raspi -m 512 -sd ~/raspbian.img -kernel ~/kernel.img -append "earlyprintk loglevel=8 panic=120 keep_bootcon rootwait dma.dmachans=0x7f35 bcm2708_fb.fbwidth=1024 bcm2708_fb.fbheight=768 bcm2708.boardrev=0xf bcm2708.serial=0xcad0eedf smsc95xx.macaddr=B8:27:EB:D0:EE:DF sdhci-bcm2708.emmc_clock_freq=100000000 vc_mem.mem_base=0x1c000000 vc_mem.mem_size=0x20000000 dwc_otg.lpm_enable=0 kgdboc=ttyAMA0,115200 console=tty1 elevator=deadline rootwait root=/dev/mmcblk0p2 panic=1 rootfstype=ext4 rw" -serial stdio -device usb-kbd -device usb-mouse -usbdevice net

At this point, you should have a usable Raspbian environment which should be faster than the real deal. Perfect for compiling and creating packages for your Raspberry Pi.

Happy hacking!

WildMIDI 0.3.7 has been released

WildMIDI

We're still quite busy with developing 0.4 and thought it was best to backport our fixes into the 0.3 branch. As a result we ended up having an additional 2 releases in the 0.3 branch!

What's new in this release

We've added DOS support in the form of SoundBlaster 16 playback in the player. The other big surprise is MIDI type-2 support, which came as a by-product of fully supporting XMI files like those from The Legend of Kyrandia. The rest of the changes are further enhancements to our build system and bug-fixes.

What to look forward to...:

We've wrapped up XMI (Eye of the Beholder 3) and Id's MUS (Doom, Raptor) support (with change of frequency support). We also have some preliminary support for playback of HMI (Daggerfall, X-COM) and HMP (Descent, Abuse) files! We are also working with the community and sharing our results, in response, they (to yet be named) are going to re-license their research and code to be more compatible with WildMIDI! This will certainly make engine re-implementation work easier for those that wish to use the library playback music. This is all being worked on currently in the 0.4 branch.

If you are interested in helping out, please leave a comment or fork the code on github! We're always looking at supporting more MIDI like formats.

The full change log:

  • Plug a memory leak in case of broken midis.
  • Properly reset global state upon library shutdown.
  • Support for type-2 midi files.
  • Fix a possible crash in WildMidi_SetOption.
  • DOS port: Support for Sound Blaster output in player.
  • Uglify the library's private global variable and function names.
  • Build: Add option for a statically linked player.
  • Build: Add headers to project files. Use -fno-common flag.
  • Other small fixes/clean-ups.
  • Fix some portability issues.
  • Fix a double-free issue during library shutdown when several midis were alive.
  • Fix the invalid option checking in WildMidi_Init().
  • Fix the roundtempo option which had been broken since its invention in 0.2.3.5 (WM_MO_ROUNDTEMPO: was 0xA000 instead of 0x2000.)
  • Fix cfg files without a newline at the end weren't parsed correctly.
  • Handle cfg files with mac line-endings.
  • Refuse loading suspiciously long files.

Downloads Source and binaries can be found on our github release page: https://github.com/Mindwerks/wildmidi/releases

WildMIDI 0.3.5 has been released

WildMIDI

We have a brand new release on our 0.3 branch! The intent here is to be the bridge between the older 0.2 series and our feature rich 0.4 that is currently under development.

Downloads Source and binaries can be found on our github release page: https://github.com/Mindwerks/wildmidi/releases

New and Old Developers

After a few months of development, we've really brought WildMIDI a long way. We are rejoined by Chris Ison (Wildcode) who had taken a small break away from development. Another developer has also joined us from uHexen2, Ozkan Sezer, who has contributed quite a lot to the project. Welcome guys! If you want to help out, just create a github account, fork us and send pull requests. Other forms of help are also appreciated, tracking down bugs and new platforms for us to support.

What's new in this release

In this release, we've incorporated a lot of bug fixes coming from downstream, mostly Linux distributions and GStreamer. We also took the time to do some static analysis and abuse valgrind to help improve code quality. The biggest win here was that we have taken a 2 minute midi file that would have used nearly 16,000 reallocs and would blow through about 400MiB of memory to just 600 reallocs and 8 MiB of memory. Great stuff...

Change log:

  • Greatly reduced the heap usage (was a regression introduced in 0.2.3)
  • OpenAL support: This gains us OSX and other platforms that OpenAL supports for sound output!
  • DOS DJGPP support: This goes a long way to helping other DOS based applications like UHexen2.
  • MinGW support: This gains us win32 and win64 support using this toolchain.
  • OSS support: No longer uses mmap mode for better compatibility. This gains us NetBSD and OpenBSD support.
  • Worked around an invalid memory read found by valgrind when playing Beethoven's Fur Elise.rmi at 44100 Hz using the old MIDIA patch-set from 1994.
  • Build fixes for MSVC. Revised visibility attributes usage.
  • Fedora support: We are now ready to see this get pushed upstream to Fedora.
  • New portable file and path-name system to handle cross-platform support.
  • Support for Debian/kFreeBSD, Debian/Hurd and other Debian archs.
  • Many bug fixes, code clean-ups and cosmetic fixes.

What to look forward to...

We mentioned above about the 0.4 series, and we are now fully committed to new feature development. This also comes at a cost, the API will be changing. Chris will be working on "Live Events", Ozkan on SB16 support under DOS and myself getting XMI support in.

What will happen to 0.3? To be clear, our 0.3 branch will live on in maintenance mode and we'll only accept patches to fix bugs. This is save us time so we don't have to backport when doing changes in the 0.4 branch.

Overall, we're extremely proud of where we are with WildMIDI and we hope you are as well!

Introducing WildMIDI version 0.3.2

WildMIDI

After several years of silence, There is now a new version of WildMIDI! Chris "Wildcode" Ison seems to have fallen off the planet around February of 2012 and the bug reports and patches have been accumulating on his SourceForge page. I decided to dump his SVN repository to github and continue hacking where he left off. We are still very much 100% API/ABI compatible and new versions can be considered drop-in replacements. We will continue to be open to developers that wish to improve WildMIDI but keep in mind that our goal is to be small and fast. We also wish Chris the very best and want very much for him to rejoin the project.

What's new?

There have been a lot of changes since WildMIDI 0.2.3.5, mostly involving our new build system.

  • Switched build system away from autotools and now using cmake
  • We can build natively on: Linux, FreeBSD, Windows and OSX
  • We support GCC, Clang, XCode and Visual Studio
  • Pulled in all out-standing patches from SourceForge, Debian and FreeBSD
  • Compile without warnings using enforced -Werrors
  • Found and fixed additional bugs

What we need: We still need people with other platforms to test WildMIDI and file bug reports and patches so that we can support more platforms as well. This includes both the library and the player.

We are also looking into adding new features, such as: XMI playback support, SF2 and DLS support.

Downloads:

  • Win32 Binaries (exe, dll, lib): WildMIDI-0.3.2-win32.zip
  • OSX Binaries: Not currently available, they can be built from source but there is currently no sound-code for the wildmidi player. You can however dump music to a WAV file.
  • Source: wildmidi-0.3.2.tar.gz
  • Free Patches (GUS):freepats_20060219.orig.tar.gz (extract the 'freepats' directory to where you want and adjust the 'dir' in wildmidi.cfg to point to it)

For more information: If you wish to read more about the History and the Future of the library, please read our WildMIDI Project page.

Screenshots running on Windows and Linux:

Debian Package Maintenance

debian

I've been there before with Gentoo, as a developer, but times and situations have changed. Over the years I've been deeply involved with Ubuntu for my work and at its heart, Debian. I've become a Debian Developer to help get closer to the development process, package management and maintenance to do my share of the heavy lifting. The first thing I did was sign up at Alioth, a software 'forge' used by Debian for collaboration. Create a 'New Account' and just be aware that whatever login name you use, it will be appended with '-guest'. This will go away once you've officially joined Debian. At this point, it is also a good idea join a Debian mailing list and/or join IRC at irc.debian.org and have a nice chat with the folks in #Debian or their various sub-channels where you would like to help. It is important to have a sponsor/mentor that can help you out if you a problem. You will need them when getting accepted into the Debian community in order to start working. If you want to help but don't know where to begin, have a look at the "Work-Needing and Prospective Packages" page. There are a few packages up for adoption, orphaned and others looking for someone to take over. Go to the appropriate group and ask about supporting your package of choice. I am currently interested in introducing a new bit of software into Debian. If accepted, it will eventually show up in Ubuntu which is an added bonus. Once accepted on Alioth, upload your public key (SSH access) in your account page and you should now have ssh/git access to git.debian.org, which gets you on your way. Once signed in, set your .gitconfig with your name and email address:

[user]
    name = Bret Curtis
    email = [email protected]

From there, we should create your new git repository:

cd /git/pkg-fonts/; ./setup-repository fonts-ebgaramond 'EB Garamond OpenType and TrueType fonts'

We can no do the rest on our local machine. We create our build environment and pull in our newly created git repo then push into that our first release.

sudo apt-get install debian-archive-keyring git-buildpackage

# on Ubuntu
git-pbuilder create --distribution sid --mirror ftp://ftp.us.debian.org/debian/ --debootstrapopts "--keyring=/usr/share/keyrings/debian-archive-keyring.gpg"
# on Debian 
git-pbuilder create

Some extra commands that help to update the environment to the latest packages or add custom packages similar to having your own chroot envrionment.

git-pbuilder update
git-pbuilder login --save-after-login

From here on, we are pulling in our git repo, which should be empty. We do an git-import-orig with a release of the project. This isn't the full repo history, just the release. We'll be asked questions about the import to validate the version number. This will create master and upstream branches. Each new release goes into the upstream branch with a tag. In master we will keep our /debian directory which should contain our control files.

git clone git+ssh://[email protected]/git/pkg-fonts/fonts-ebgaramond.git fonts-ebgaramond
git-import-orig --pristine-tar ../v0.015.tar.gz
git commit -a -m 'Setting up the first release.'
git push --all

Once you have a working /debian control files in place, let's try to get it to build and produce Debian packages. We run litian afterwards to try to catch any errors in our control files.

export DEB_BUILD_OPTIONS="parallel=8" # or how many cores you wish to use
git-buildpackage --git-ignore-new --git-pbuilder
lintian --pedantic -I

From here on, talk to your mentor and when you think you are ready, it is then time to "Intent to Package" (ITP) and file a bug report. Make sure you can send email first with:

mail -s Testing_1 [email protected] < /dev/null

Should you get this back in your email, then are good to go! Use reportbug and follow through with the instructions with your ITP.

#On Ubuntu
reportbug --email [email protected] -B debian wnpp

#On Debian
reportbug --email [email protected] wnpp

This will get you on your way to maintaining your own package. This will file a bug and put it on the mailing list so that the appropriate people see this. Prepare for push-back and questions, this is normal. They will give advice to make sure your package is ready to be added to Debian. Good luck! Update: 20141024 - When there is a new release, here are the additional steps. First clone the repo if you don't already done so, then setup your branches.

git clone git+ssh://[email protected]/git/pkg-fonts/fonts-ebgaramond.git fonts-ebgaramond
fonts-ebgaramond
git branch -a
* master
  remotes/origin/HEAD -> origin/master
  remotes/origin/debian
  remotes/origin/master
  remotes/origin/upstream
git checkout -t origin/debian
git checkout -t origin/upstream
git branch -a
  debian
  master
* upstream
  remotes/origin/HEAD -> origin/master
  remotes/origin/debian
  remotes/origin/master
  remotes/origin/upstream
git checkout master
git-import-orig --pristine-tar ../v0.015d.tar.gz

Here you follow prompts, then when finished, give it a spin with building. Be sure to update your changelog and any version related issues.

Wireless BCM4312 with the 3.10, 3.11, 3.12 and 3.13 kernels

Broadcom Chipset BCM4312

The hybrid driver from Broadcom was updated again in September (2013) with all the previous patches and a few other fixes as well. This brings them up to support linux kernel 3.9, which is very much welcome.

Sadly it breaks again with >= 3.10 with many warnings and errors which isn't good considering that Ubuntu (13.10) Saucy Salamander is about to be released.

We do have a patch for you though that gets us working again up to the 3.11 kernel.

Chipsets supported by "Broadcom’s IEEE 802.11a/b/g/n hybrid Linux® device driver" are: BCM4311, BCM4312, BCM4313, BCM4321, BCM4322, BCM43224, BCM43225, BCM43227 and BCM43228.

The error you will run into:

bcurtis@Aria:~/Workspace/wl.orig$ make KBUILD_NOPEDANTIC=1 make -C /lib/modules/uname -r/build M=pwd make[1]: Entering directory /usr/src/linux-headers-3.11.0-11-generic' CFG80211 API is prefered for this kernel version Using CFG80211 API LD /home/bcurtis/Workspace/wl.orig/built-in.o CC /home/bcurtis/Workspace/wl.orig/src/shared/linux\_osl.o CC /home/bcurtis/Workspace/wl.orig/src/wl/sys/wl\_linux.o /home/bcurtis/Workspace/wl.orig/src/wl/sys/wl\_linux.c: In function ‘wl\_tkip\_printstats’: /home/bcurtis/Workspace/wl.orig/src/wl/sys/wl\_linux.c:3246:7: warning: passing argument 1 of ‘wl->tkipmodops->print\_stats’ from incompatible pointer type wl->tkip\_bcast\_data); ^ /home/bcurtis/Workspace/wl.orig/src/wl/sys/wl\_linux.c:3246:7: note: expected ‘struct seq\_file \*’ but argument is of type ‘char \*’ /home/bcurtis/Workspace/wl.orig/src/wl/sys/wl\_linux.c:3249:4: warning: passing argument 1 of ‘wl->tkipmodops->print\_stats’ from incompatible pointer type wl->tkipmodops->print\_stats(debug\_buf, wl->tkip\_ucast\_data); ^ /home/bcurtis/Workspace/wl.orig/src/wl/sys/wl\_linux.c:3249:4: note: expected ‘struct seq\_file \*’ but argument is of type ‘char \*’ /home/bcurtis/Workspace/wl.orig/src/wl/sys/wl\_linux.c: In function ‘wl\_reg\_proc\_entry’: /home/bcurtis/Workspace/wl.orig/src/wl/sys/wl\_linux.c:3470:2: error: implicit declaration of function ‘create\_proc\_entry’ [-Werror=implicit-function-declaration] if ((wl->proc\_entry = create\_proc\_entry(tmp, 0644, NULL)) == NULL) { ^ /home/bcurtis/Workspace/wl.orig/src/wl/sys/wl\_linux.c:3470:22: warning: assignment makes pointer from integer without a cast if ((wl->proc\_entry = create\_proc\_entry(tmp, 0644, NULL)) == NULL) { ^ /home/bcurtis/Workspace/wl.orig/src/wl/sys/wl\_linux.c:3475:16: error: dereferencing pointer to incomplete type wl->proc\_entry->read\_proc = wl\_proc\_read; ^ /home/bcurtis/Workspace/wl.orig/src/wl/sys/wl\_linux.c:3476:16: error: dereferencing pointer to incomplete type wl->proc\_entry->write\_proc = wl\_proc\_write; ^ /home/bcurtis/Workspace/wl.orig/src/wl/sys/wl\_linux.c:3477:16: error: dereferencing pointer to incomplete type wl->proc\_entry->data = wl; ^ cc1: some warnings being treated as errors make[2]: \*\*\* Error 1 make[1]: \*\*\* Error 2 make[1]: Leaving directory/usr/src/linux-headers-3.11.0-11-generic' make: *** Error 2

The rundown:

  1. Download the 32 or 64-bit version: http://www.broadcom.com/support/802.11/linux_sta.php
  2. Download the patch: wl_3.10.patch
  3. Extract the sources: cd ~/Downloads; mkdir -p wl; cd wl; tar xf ../hybrid-*.tar.gz
  4. Patch and compile the sources: patch -p2 < ~/Downloads/wl_3.10.patch; make; sudo make install; sudo depmod; sudo modprobe wl

Give Ubuntu a few seconds after loading the "wl" kernel module, then eventually the Network Manager will start looking for wireless networks.

TL;DR: These patches are required for a working wl kernel module for the 3.10 and 3.11 kernel series.

Update (2014-04-22): Known to also work with Raring (14.04) that uses the 3.13 kernel.

Transcoding for mobiles

transcode-icon

There are times where I need a few films on my mobile for my son to watch. For my particular mobile "Galaxy Gio" the constraints for hardware acceleration is 360p as anything bigger will cause it to switch to software which is slower and sometimes a slideshow. For the uninitiated, 360p means either 480x360 at 4:3 ratio (your old TV) or 640x360 at 16:9 ratio (your HD TV).

First we need to cleanup our file names and sometimes 'rename' doesn't work properly. We list all files and separate them by commas and then parse line by line to first remove everything between () and then everything between []. We then move from the old name to the new name. File name cleanup: IFS=","; files=`ls --format commas | tr -d '\040\011\012\015'`; for file in $files; do newfile=`echo $file| sed 's/(.*)//' | sed 's/\[.*\]_//' | sed 's/_\[.*\]//' `; mv $file $newfile; done The code above will try to remove spaces, and everything between () and [].

ls | while read -r FILE do mv -v "$FILE" `echo $FILE | tr ' ' '_' | tr -d '[{}(),\!]' | tr -d "\'" | tr '' '' | sed 's/_-_/_/g'` done The above code will convert all your spaces to underscores, remove characters like {}(),! and convert the filename to lowercase.

ls | while read -r FILE do mv -v "$FILE" `echo $FILE | tr ' ' '_' ` done The above just converts all spaces to underscores.

Mass encoding: IFS=', '; set +x; for x in `ls --format commas | tr -d '\040\011\012\015'`; do height=`mediainfo $x | egrep -i "Height " | cut -d":" -f2 | sed 's/[^0-9]*//g'`; if [ $height -gt 360 ]; then name=`echo $x | sed 's/[^0-9]*//g'`; avconv -i $x -vcodec mpeg4 -acodec copy -scodec copy -threads 4 -vb 800000 -vf scale=640:360 series_name_${name}_SD.mkv; fi done

This last bit will go through your directory looking for media files who's height is greater than 360 and then transcode it to a lower resolution MKV file. Feel free to change MKV to AVI or whatever avconv supports as a container format. This keeps the original music, fonts and subtitles intact. By lowering the resolution, we match the screen resolution of the mobile and allow for hardware acceleration which will spare your battery. This has been incredibly handy during long flights with the kids.

Update: Convert to xvid that converts the audio track to mp3, this helps with playback on low end hardware DVD players as well as mobiles. avconv -i something.HDTV.mkv -vcodec mpeg4 -vtag xvid -acodec libmp3lame -ab 128k -ac 2 -ar 44100 -scodec copy -threads 4 -vb 800000 -vf scale=640:360 something.HDTV.avi

For aac (better quality and to preserve 5.1 audio): avconv -i something.HDTV.mkv -vcodec mpeg4 -vtag xvid -acodec aac -ab 192k -ar 44100 -strict expiremental -scodec copy -threads 4 -vb 800000 -vf scale=640:360 something.HDTV.avi

Should you need to adjust the aspect ratio and/or scale down, there are tools available to help. Aspect Ratio Calculator avconv -i something.HDTV.mkv -vcodec mpeg4 -acodec aac -ab 192k -ar 44100 -strict expiremental -scodec copy -threads 4 -vb 800000 -aspect 45:22 -vf scale=640:313 something.HDTV.mkv

Worldsynth 0.11.0 released

Rivers

Worldsynth version 0.11.0 is released and can be found on github.

In this release we've added an additional algorithm for heightmap generation based on Ken Perlin's work in noise generation. We decoupled the sea-level to be configurable based on percentage, which in addition to masks we can now create islands. You can also save your world and open it up later since we use pytables to store our settings, metadata and our data in an open hdf5 format. You can also export your heightmap in 16-bit PNG greyscale or even import from a wide array of images formats as a heightmap. Importing from an image creates a 16-bit precision greyscale heightmap. In addition to this, one commenter ask about Python3 support, well now you have it.

The immediate future of Worldsynth has the following: fluvial erosion, better river erosion, better river flow/snaking and editing properties of world.

Here are some screenshots of some of the latest features:

noise

options

island

seaLevel

elevation

Upgrade Samsung Galaxy Gio to CyanogenMod 10.1

Android

After about a year of Gingerbread (2.2.3) and CyanogenMod (7.2), I thought it was time again to look at further upgrades to my Galaxy Gio. This was apparently enough time for developers to work out problems involved in dealing with Ice Cream Sandwich (4.0.x) and Jelly Bean (4.[1-2].x) such as no ICS (or greater) libs and codecs from Qualcomm for the MSM7x27 family of chips for hardware acceleration.

Thanks to the Samsung Galaxy Gio community at xda-developers, we now have CyanogenMod (10.1) which is based on Jelly Bean (4.2.2) that is usable for every day use. There are a few things that I've noticed that are not perfect, but it is a fully usable ROM. Before you do anything suggested below, it is wise to first backup anything you think important and not just to your SD as it will be overwritten to support an extra ext4 partition that can be used to store your applications and save valuable space. Make sure your SD is rated 6 or better.

You will need a new version of the Clockworkmod recovery rom for your Gio that specifically supports Jelly Bean. You should read more about the clockworkmod recovery image. Here is a wiki to answer some of your questions about it. ClockworkMod installation procedure:

  1. Download to your sd-card the cwm-6.0.2.7-itachiSan-ext4only.zip (clockworkmod 6.0.2.7) as your recovery rom image.
  2. Reboot into recovery mode, hold down the Home/OK (middle) button and press the Power button.
  3. In recovery mode, use the Volume buttons for navigation and the Home/OK button for selecting.
  4. Select “Update from SD card” from the recovery menu and drill down to cwm-6.0.2.7-itachiSan-ext4only.zip and press OK
  5. Reboot again into recovery mode and you should now have the new CWM recovery screen.
  6. Please wipe date/factory reset.
  7. Once finished head down to advanced and then to partition sdcard. Select 4096M (or smaller if your SD card is not big enough) for your new ext4 partition and hit OK, then select your swap partition size of 256M (or 0 if you do not wish to use swap on SD card) and press OK to create your new partitions.
  8. You are now ready to install CyanogenMod 10.1!

Once CWM is installed and you've created your new partitions, we should be ready to install CyanogenMod. The new partitions are purely optional, but I use them to help offset the Gio's memory is really small. You should have 3 partitions on your SD card, 1 that you can use to store applications on in ext4, 1 for swap and the last one is your normal fat32 partition. CM10.1 doesn't automatically make use of this, but I installed a separate application that makes the proper symlinks. It is advisable to install this application right after CM10.1 is installed. If you wish to read more about this particular blend of CynanogenMod, please follow the forums here: http://forum.xda-developers.com/showthread.php?t=1804646

Installation of CyanogenMod 10.1 for Samsung Gio

  1. Download last known good build:cm-10.1.0-RC6-GT-S5660-gio.zip which has been thoroughly tested and widely installed. or Download last known stable build:cm-10.1.6-GT-S5660-gio.zip is the latest build in the stable series. It is also reliable.
  2. Copy the file to your SD card
  3. Reboot into Recovery Mode (CWM)
  4. Select install zip from sd card
  5. Select "cm-10.1.*-GT-S5660-gio.zip" ROM
  6. Select Yes - Install update
  7. Wait till the Installation is finish
  8. Select 'wipe data/factory reset'
  9. Select 'reboot mobile' and enjoy

After you have settled into your new Android version, head over to XDA and download a modified version of S2E. Install S2E from clockworkmod, reboot and configure it to your liking. I check everything but Application data for performance reasons. Once you have it configured how you like it, make sure that the status is enabled and you need to restart your mobile for settings to take effect.

The next thing you should look into is getting the "Developers Options" screen to appear in settings. By pressing the "Build number" in the about section 7 times, you'll get access to an important part of the phone. I go to the CPU functions and set the min to the lowest the CPU will go and highest to a 825Mhz with the Smartassh3 governor. This creates a very smooth experience and an extra bit of raw power on top when necessary.

Some addition tips to help manage your battery: turn off any services you don't need, don't use too many widgets, the widgets you do use should not interrupt deep sleep, keep brightness to medium.

Enjoy your "new" mobile! :)

Update (20130625): Since Olddroid's project is abandoned, I've switched to using Erika's build he is a member of the androidarmv6 team.

Update (20131104): I've been running latest release from androidarm6 team for about a month now, and it has been very stable. I've not had one single unexpected restart. Cheers! cm-10.1.6-GT-S5660-gio.zip

Note: Should you ever run into a situation where your mobile is unresponsive and possibly 'bricked', then you should have a look at this thread about "one click unbricking" to try to get your mobile back in working order.

This is part 3 of a 3 part series about the Galaxy Gio. Part1: Upgrade Samsung Galaxy Gio from 2.2.x Froyo to 2.3.x Gingerbread Part2: Upgrade Samsung Galaxy Gio to CyanogenMod 7.2 Part3: Upgrade Samsung Galaxy Gio to CyanogenMod 10.1

Here are screenshots of what to expect:

Screenshot_2013-05-06-13-29-04

Screenshot_2013-05-06-13-29-16

Screenshot_2013-05-06-13-29-37

Screenshot_2013-05-06-13-29-57

Screenshot_2013-05-06-13-30-02

Screenshot_2013-05-06-13-30-37

Screenshot_2013-05-06-13-31-17

Screenshot_2013-05-06-13-31-50

Screenshot_2013-05-06-13-31-56

Worldsynth 0.10.0 released

Rivers

Worldsynth version 0.10.0 is released and can be found on github. This is our first "official" release in which the result should work, out of the box, with a usable and familiar GUI instead of the pygame environment. This is provided by Qt4 via PySide. We have even tested Worldsynth on Windows XP to validate that it is indeed cross platform.

As for 0.11.0, we are looking to unlock size of terrain to be of any variable width and height instead of the basic power of two. We are also investigating fluvial erosion.

Here is a demo of the latest release: https://www.youtube.com/watch?v=xgxS1MpVBeY

Some of the things changed in this release are:

Improved our just-in-time library loading so that only libraries are loaded as needed and were needed. This also helped to reduce the number of dependencies necessary for running Worldsynth.

We implemented an erosion model so that we can use it as an overlay over the original heightmap.

There is also now an overflow flag that treats the terrain generated as one that wraps. Rivers, for example, can flow off edges of maps, overflow into other side. This make the world seamless and one step closer to being able to wrap the terrain to a globe and having a world.

We also have a demonstration of Worldsynth running on Windows. https://www.youtube.com/watch?v=QaHid9-etzo

Here are the files and libraries necessary to run Worldsynth on Windows: